A Beginner's Guide to DIY Battery Reconditioning at Home
Hey there, battery enthusiasts and DIYers! Have you ever felt the frustration of a dying battery? Maybe your car battery is losing its mojo, or your power tool batteries just don't hold a charge like they used to. Well, don't throw those batteries away just yet! There might be a second life for them, thanks to the magic of battery reconditioning.
Now, before we dive into the nitty-gritty, let's get one thing straight: battery reconditioning isn't a magic spell that'll bring your old batteries back to their pristine glory. It's more like a gentle nudge, a way to coax a bit more life out of them. Think of it as a spa day for your batteries.
This guide is for the brave DIYers out there, folks who aren't afraid to get their hands dirty and potentially save a few bucks in the process. But remember, safety first! Batteries can be dangerous, so we'll be covering all the essential safety precautions. So grab your safety goggles, a trusty pair of gloves, and let's get this battery rejuvenation journey started!
What is Battery Reconditioning?
In a nutshell, battery reconditioning aims to restore the capacity and performance of a battery that has lost its punch. It involves a combination of techniques, such as:
- Desulfation: This process removes lead sulfate crystals that build up on the battery plates, hindering their ability to store and release energy.
- Electrolyte equalization: This ensures that the electrolyte solution is distributed evenly throughout the battery, maximizing its efficiency.
- Cleaning: Cleaning the battery terminals and posts helps improve the flow of electricity.
The effectiveness of reconditioning varies depending on the age, condition, and type of battery. It's more likely to work on batteries with a moderate level of degradation.
Types of Batteries You Can Recondition
The most common batteries you might want to recondition are:
- Lead-acid batteries: These are the workhorse batteries found in cars, motorcycles, boats, and even some power tools.
- Deep-cycle batteries: These are designed for extended discharge cycles, like in golf carts, solar systems, and RVs.
- Marine batteries: These are built to withstand the harsh conditions of marine environments.
Note: Reconditioning other types of batteries, like lithium-ion batteries, can be a bit more complex and might require specialized equipment. We'll stick to the more common lead-acid batteries for this guide.
Safety First! Precautions for DIY Battery Reconditioning
Before you even think about picking up a screwdriver, take the time to understand the potential hazards of working with batteries:
- Acid burns: The electrolyte in lead-acid batteries is sulfuric acid, which can cause severe burns. Wear eye protection and gloves!
- Explosions: Batteries can explode if they are overcharged or mishandled. Never attempt to recondition a battery that is damaged or leaking.
- Electrical shock: Even a seemingly dead battery can deliver a nasty shock. Be careful when connecting and disconnecting wires.
- Hydrogen gas: Battery reconditioning can produce hydrogen gas, which is flammable. Always work in a well-ventilated area.
It's important to be extra careful when dealing with batteries. If you're unsure about any aspect of the process, it's best to seek professional help.
Tools and Materials You'll Need
Gather your tools and materials before you start. You'll need:
- Battery reconditioning kit: This usually includes a battery charger with desulfation capabilities, a hydrometer, and sometimes a cleaning solution.
- Safety glasses: Protect your eyes from splashes and fumes.
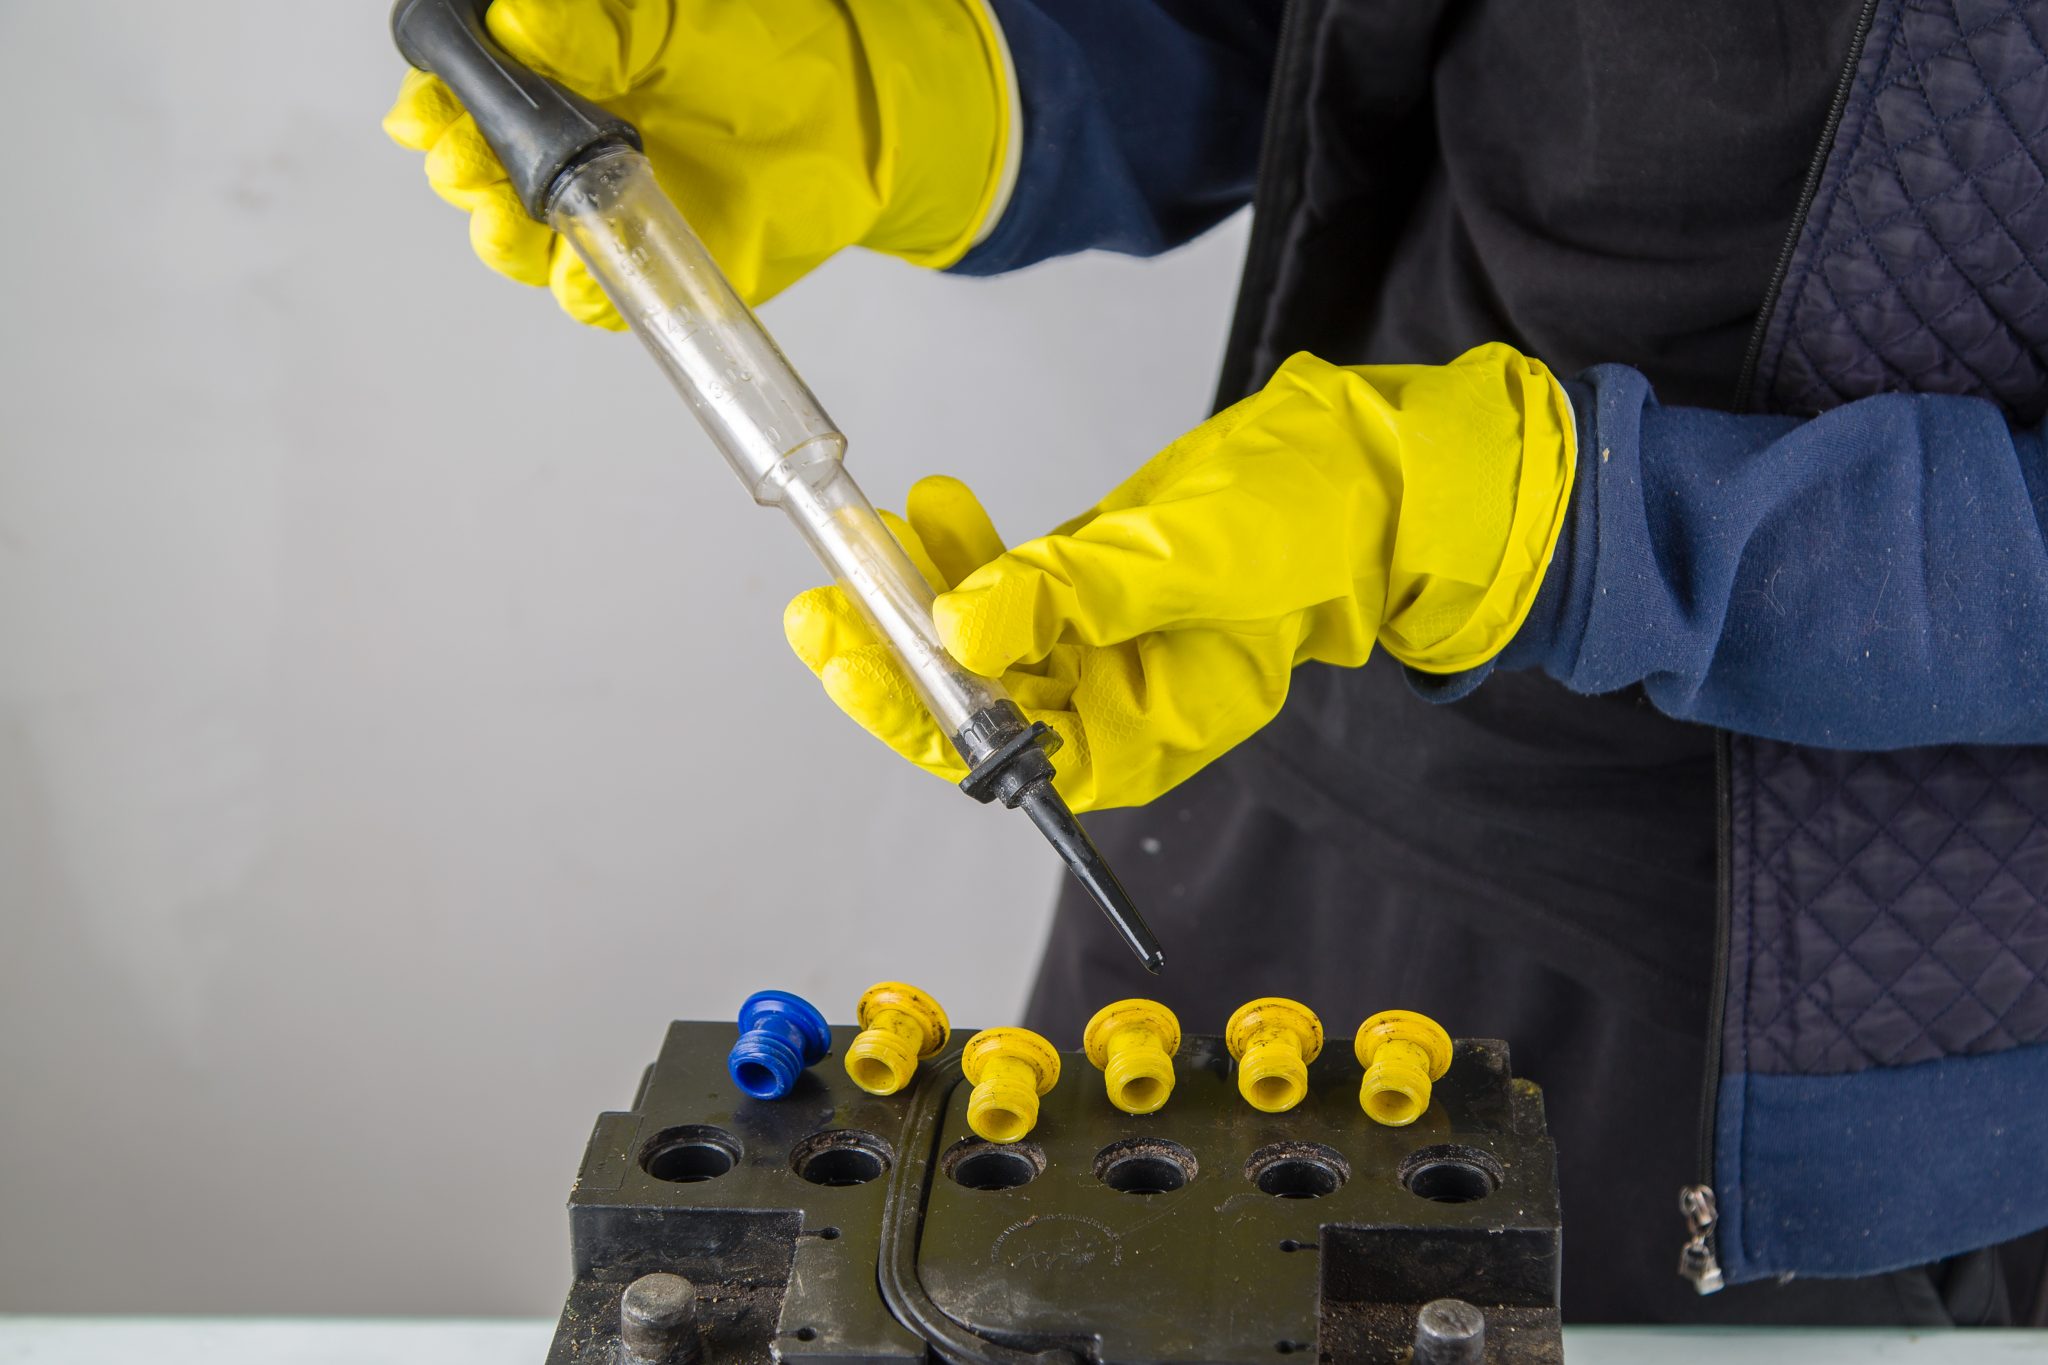
- Gloves: Rubber gloves will protect your hands from acid contact.
- Baking soda: To neutralize any acid spills.
- Distilled water: For topping off the battery electrolyte.
- Cleaning tools: Wire brush, terminal cleaning tool, and a cloth.
- A workspace: Choose a well-ventilated area where you can work comfortably. Keep it away from flammable materials.
Step-by-Step Guide to Battery Reconditioning
Alright, now that you've got your gear and safety measures in place, let's get down to business:
1. Preparation and Inspection
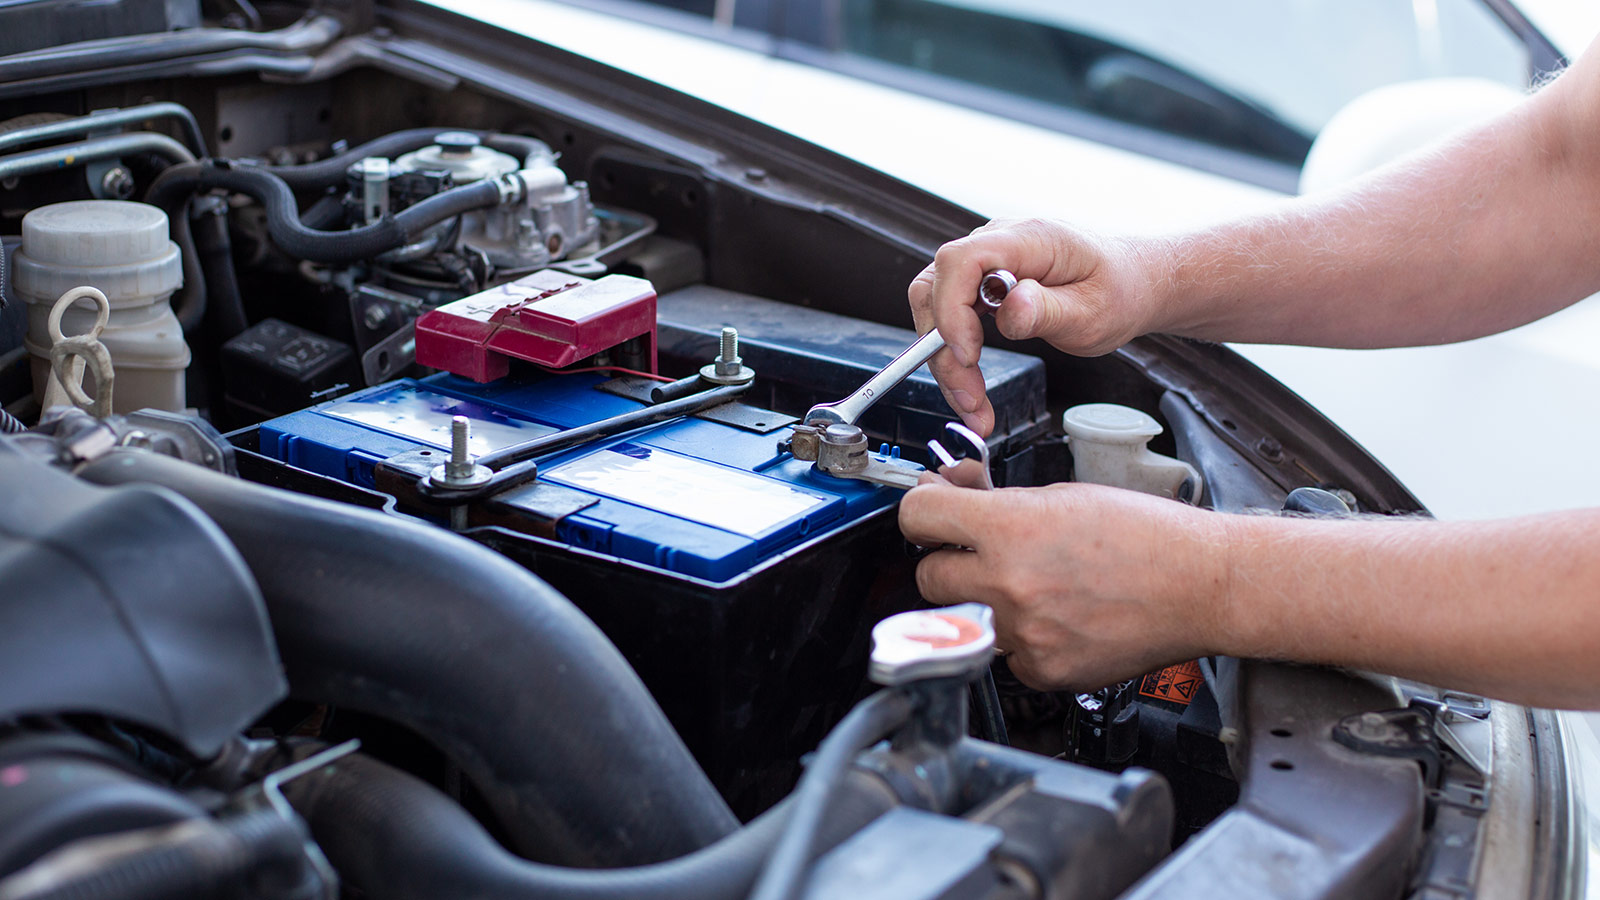
- Disconnect the battery: Always disconnect the negative cable first, followed by the positive cable. This prevents accidental shorts.
- Inspect for damage: Look for cracks, leaks, bulging, or corrosion. If you find any, it's best to replace the battery.
- Check the electrolyte level: The electrolyte level should be just above the battery plates. If it's low, add distilled water until it reaches the proper level.
- Clean the terminals: Use a wire brush or terminal cleaning tool to remove corrosion from the terminals.
2. Desulfation
This is the key process that aims to remove lead sulfate buildup on the battery plates. Here's how it's done:
- Use a battery reconditioning charger: These chargers typically have a desulfation mode that applies a series of pulses to the battery. Follow the instructions provided with your charger.
- Check the battery's voltage: The battery's voltage should gradually increase during the desulfation process.
- Monitor the battery's temperature: It's normal for the battery to get a little warm during desulfation, but it shouldn't get excessively hot. If it does, stop the process and let it cool down.
3. Electrolyte Equalization
This step ensures that the electrolyte solution is evenly distributed throughout the battery. Here's how you can do it:
- Use a hydrometer: This tool measures the specific gravity of the electrolyte in each cell of the battery.
- Balance the electrolyte: If the specific gravity readings are uneven, you might need to add distilled water to the cells with lower readings or remove some electrolyte from the cells with higher readings. This is a delicate process, so it's best to follow the instructions provided with your battery reconditioning kit.
4. Final Charging and Testing
The final step is to fully charge the battery using a standard battery charger. Once it's fully charged, you can test its performance by:
- Checking the voltage: A fully charged lead-acid battery should have a voltage of around 12.6 volts.
- Performing a load test: This measures the battery's ability to deliver current under a load. You can use a battery load tester or connect the battery to a device that draws a significant amount of current, like a car starter.
Tips for Success
- Start with a clean battery: A clean battery is more likely to respond well to reconditioning.
- Be patient: The reconditioning process can take several hours or even days, depending on the battery's condition and the desulfation method used.
- Don't overcharge the battery: Overcharging can damage the battery and lead to explosions.
- Don't recondition a severely damaged battery: If the battery is cracked, leaking, or has a severely corroded case, it's best to replace it.
Is Battery Reconditioning Right for You?
Battery reconditioning can be a worthwhile endeavor for DIYers who want to extend the life of their batteries and save some money. However, it's not a guaranteed solution. The effectiveness depends on the battery's condition, and there's always a risk involved.
If you're unsure whether to recondition your battery or simply replace it, it's always best to err on the side of caution. Remember, your safety should always be your top priority!
Happy DIYing, and may your batteries regain their lost glory!